Down the Rabbit Hole: My First Custom Mechanical Keyboard Build
- Hardware, Development
- 14 Jun, 2026
So, I finally did it. After years of staring at beautifully lit, perfectly sounding typing tests on YouTube, I took the plunge into the bottomless pit that is the custom mechanical keyboard hobby. If you are a developer, a writer, or just someone who spends eight to ten hours a day glued to a screen, you probably already have an opinion on your peripherals. But building a board completely from scratch? That's an entirely different beast. Let me walk you through my experience, the unexpected frustrations, and why I genuinely believe it was worth the effort.
First off, let’s talk about why I even bothered. For years, I was perfectly happy with my pre-built, mass-produced mechanical keyboards. I swore by Cherry MX Browns, occasionally venturing into Blues when I was working from home and didn't mind sounding like a machine gun. But lately, I noticed that my fingers felt fatigued after long coding sessions. The harsh bottom-out of standard plastic cases and the rattly stabilizers on my spacebar started driving me crazy. I realized that my keyboard is my primary tool for translating thoughts into code. If a chef spends thousands on their knives, why shouldn't I invest time in customizing my primary instrument?
The process started with selecting the barebones kit. I opted for a 75% layout. It's the perfect sweet spot for software engineering—you keep the dedicated arrow keys and the function row for debugging, but you reclaim precious desk space compared to a full-sized 104-key monster. I chose an aluminum case for that premium, heavy feel that simply doesn't budge on my desk pad.
Then came the switches. This is where the true customization begins, and where I spent way too many nights reading forum threads. Do you want linear, tactile, or clicky? What actuation force feels right? I ultimately settled on a set of premium linear switches known for their smoothness. But buying them wasn't enough; I had to lube them.
Let me be brutally honest: lubing switches is an exercise in extreme patience. You sit down with a tiny brush, a tub of Krytox 205g0 lubricant, and carefully take apart 80 individual switches. You paint a microscopic layer of lube on the stem rails, the spring, and the housing, being careful not to over-lube and make them sluggish. It took me four hours on a Saturday afternoon. My back hurt, my eyes were strained, and I questioned my life choices. However, when I finally snapped those lubricated switches into the hot-swap PCB and pressed down... the difference was night and day. The scratchy, hollow sound was completely gone, replaced by a deep, incredibly smooth 'thock' that felt like typing on a cloud of butter.
Tuning the stabilizers was another hurdle. There is nothing worse than a perfectly smooth keyboard ruined by a spacebar that rattles like loose change in a washing machine. I used the 'Holee mod'—cutting microscopic strips of band-aids to line the stabilizer stems—along with a generous coating of dielectric grease on the wires. It is a messy, frustrating process, but the result is a spacebar that sounds exactly like a normal keycap, just deeper.
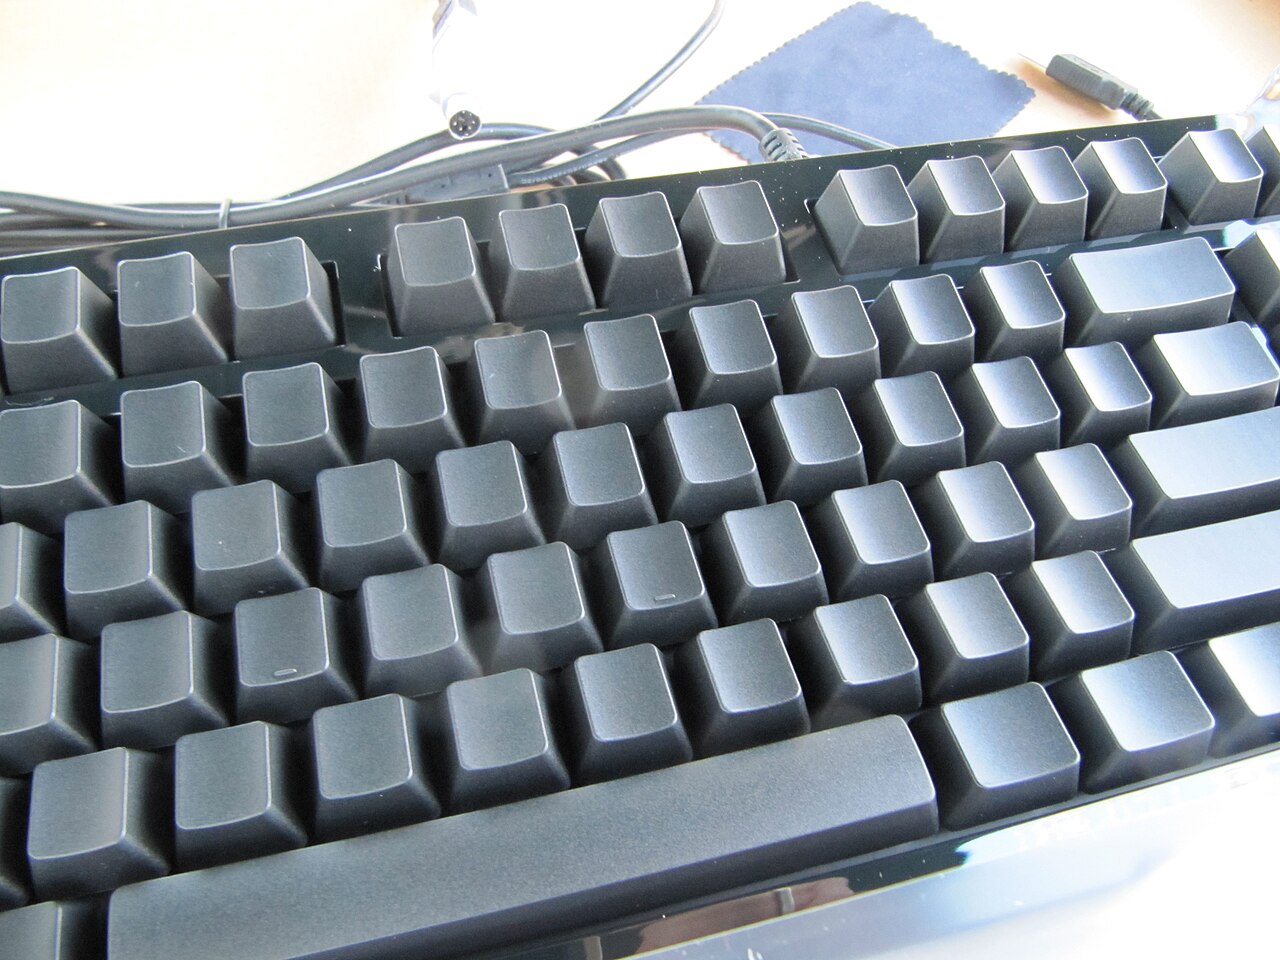
Finally, I snapped on a set of thick PBT keycaps. PBT plastic resists that shiny, greasy wear that cheaper ABS keycaps get over time, and the thicker walls contribute to a much better acoustic profile.
So, was spending hours applying grease to plastic parts worth it? Absolutely. The typing experience is vastly superior to any pre-built board I’ve ever touched. My typing speed hasn't magically increased, but my accuracy has, and the sheer tactile joy of hitting those keys makes writing documentation or debugging dense logic feel slightly less agonizing. It turned my daily workflow from a chore into a genuinely satisfying sensory experience. If you are a professional who types for a living, I highly recommend considering building your own. Just be prepared to lose a whole weekend to the process!